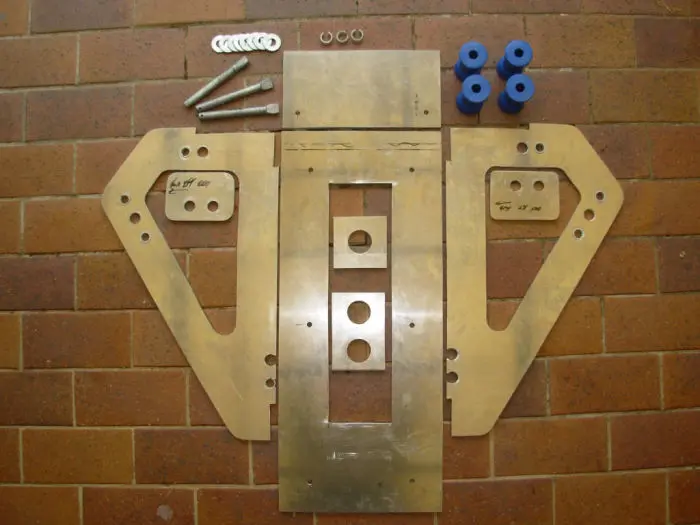
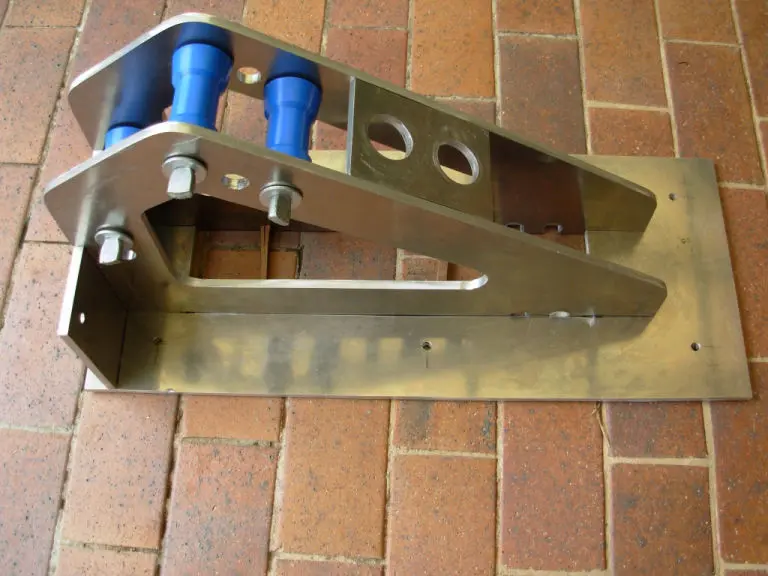
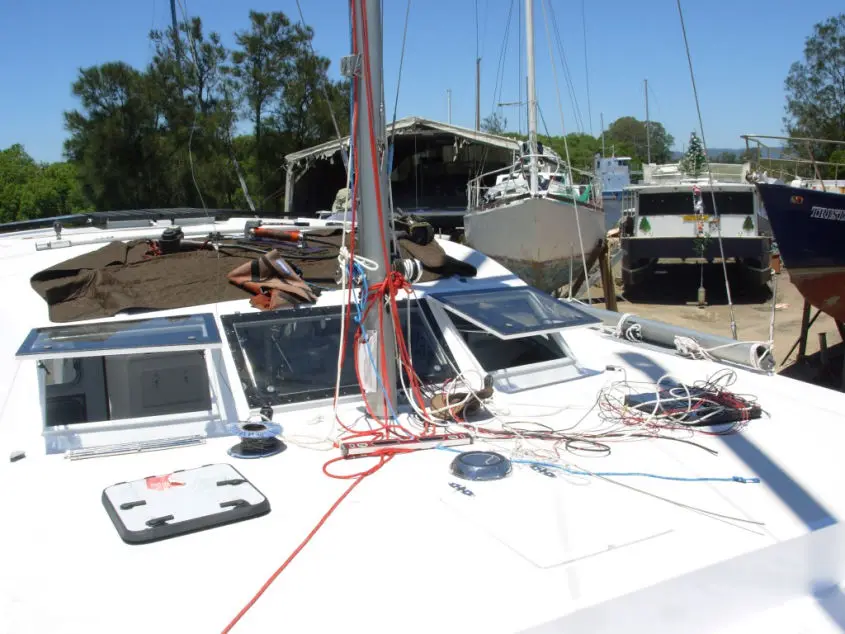
The components were cut at home using a jigsaw (and about 8 aluminium cutting blades) and an Angle Grinder. Also cut at the same time were the desalinator and radar frames.
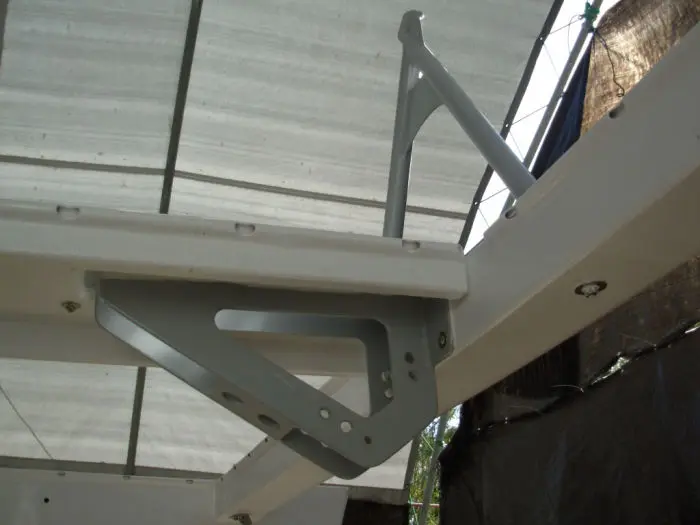
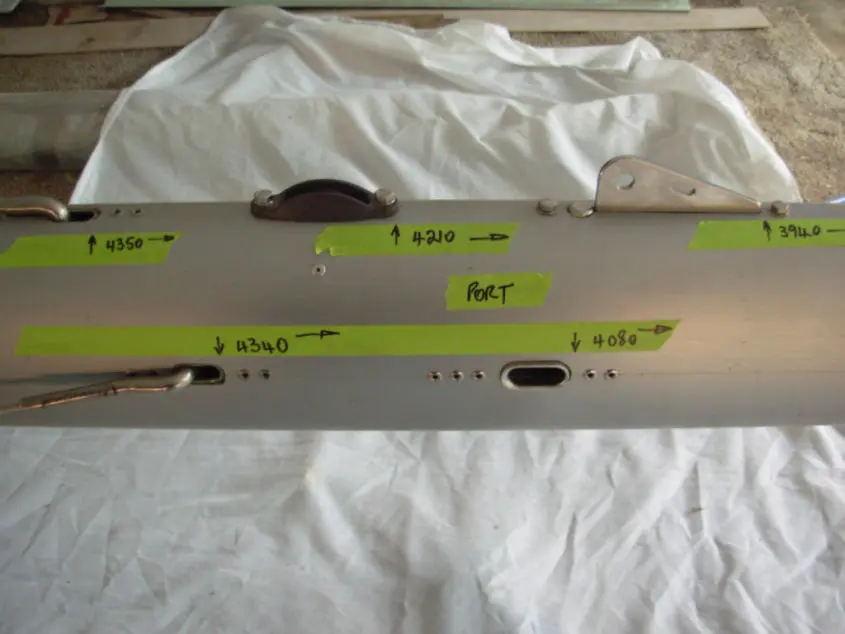
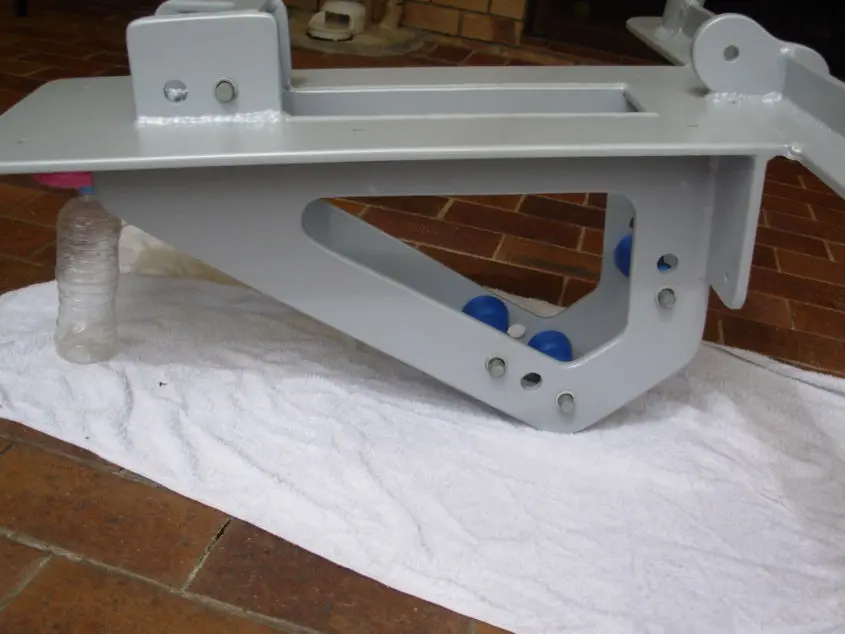
The roller holes have been cut to take standard fittings from the boat-shop. Given that the shop items are galvanised steel, this would definitely not be compatible with straight Aluminium. We have made bushes that slot into the holes and are easily replaced when and if needed.
The number of holes are to provide the best fitting once in the water and also in the event that one hole-pair wear to much, they can be moved to the next most suitable.
We have seen this anchor system copied on many other yachts now which is fantastic. Please refer our Terms of Use.
The specifications and far more detail are are provided free in our books.
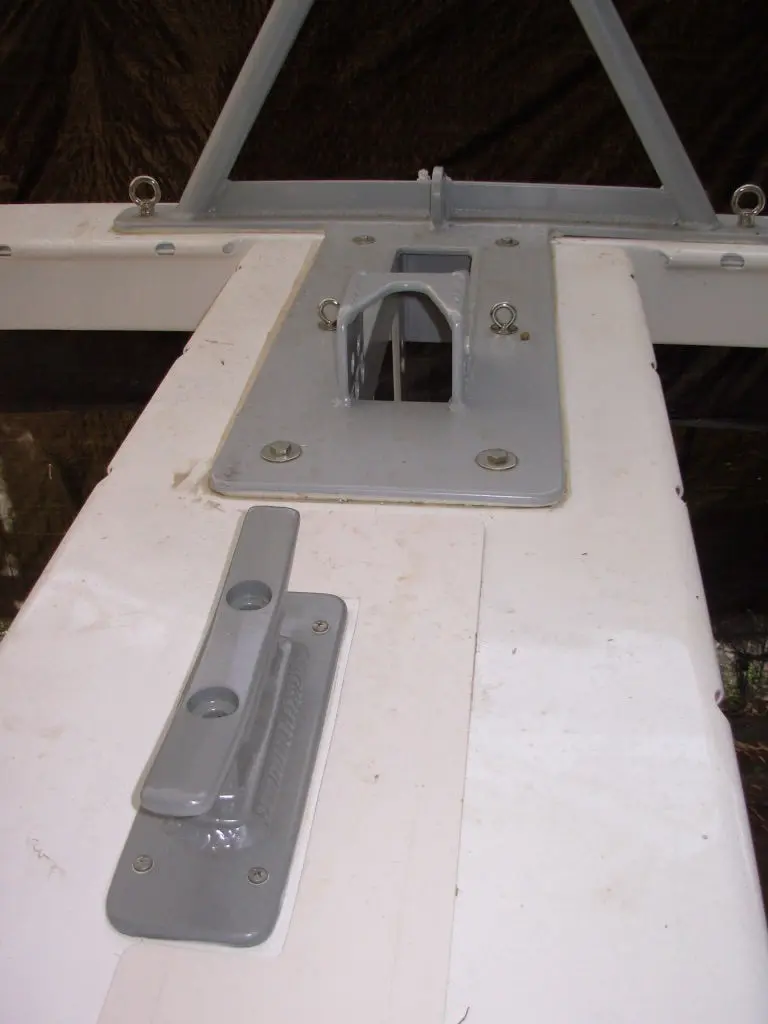
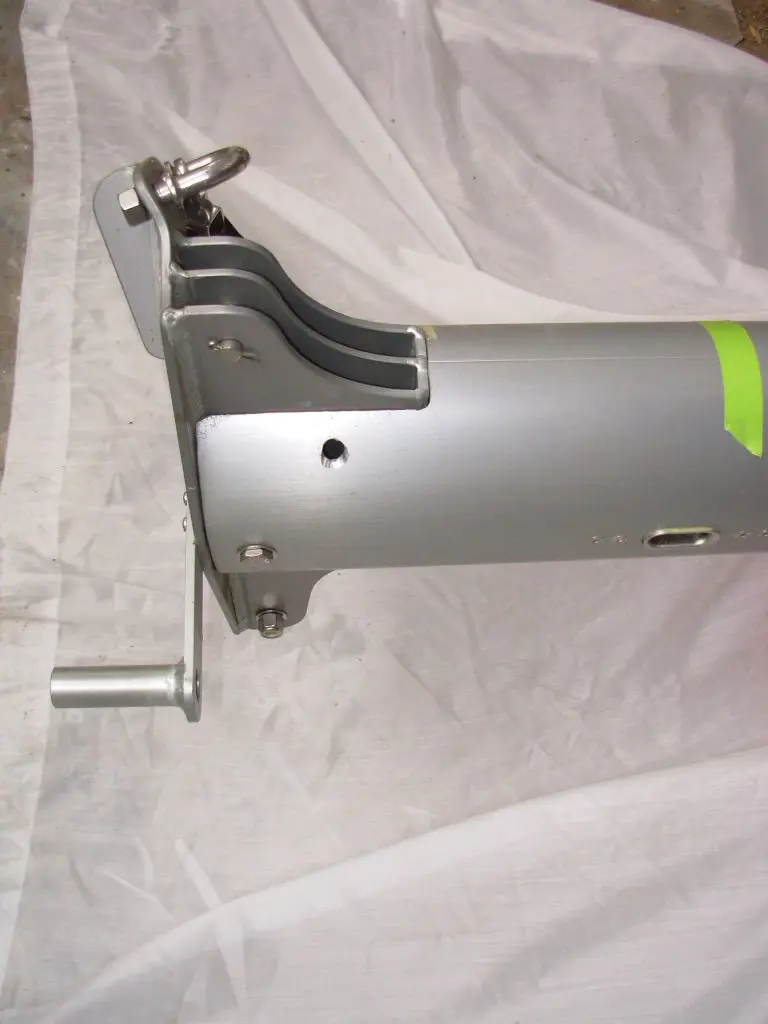
The Sarca Anchor top arc also went into the build equation, as it does stand out a little and could easily damage the fore beam if not managed correctly. The Sarca also happened to be one of the physically larger anchor types making the fitting of any other anchor type within the Anchor-winch-assembly, easy.
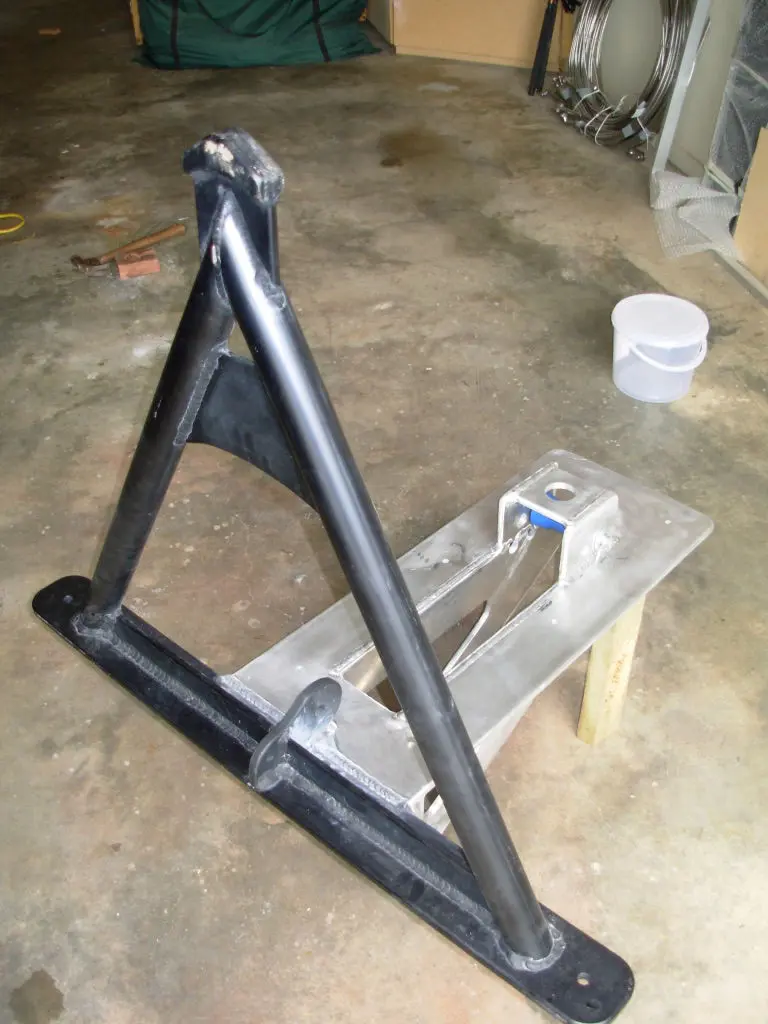
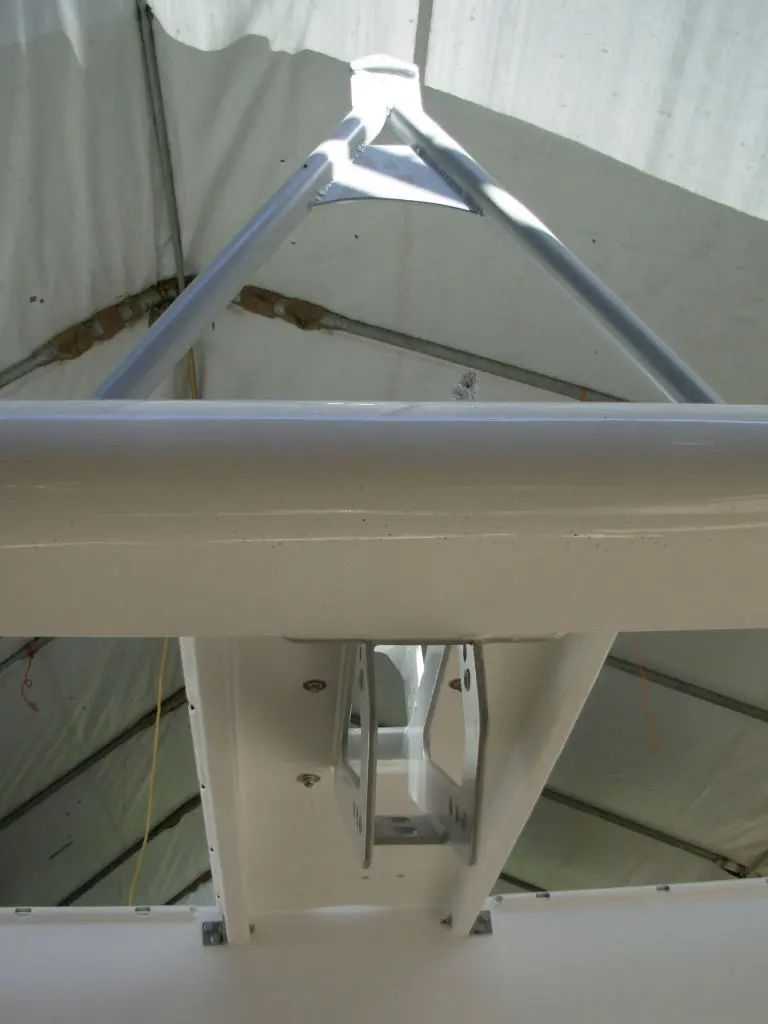
We also wanted the unit to be one with the:
> Fore beam A-frame,
> Cat walk brackets, and
> Fore-stay Tang.
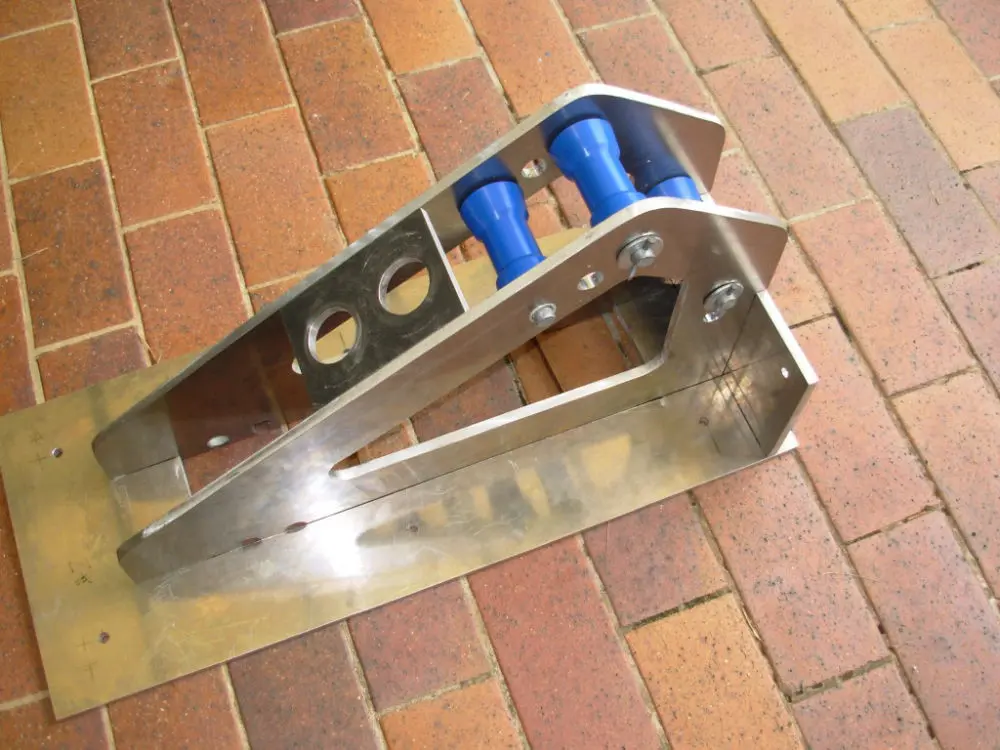
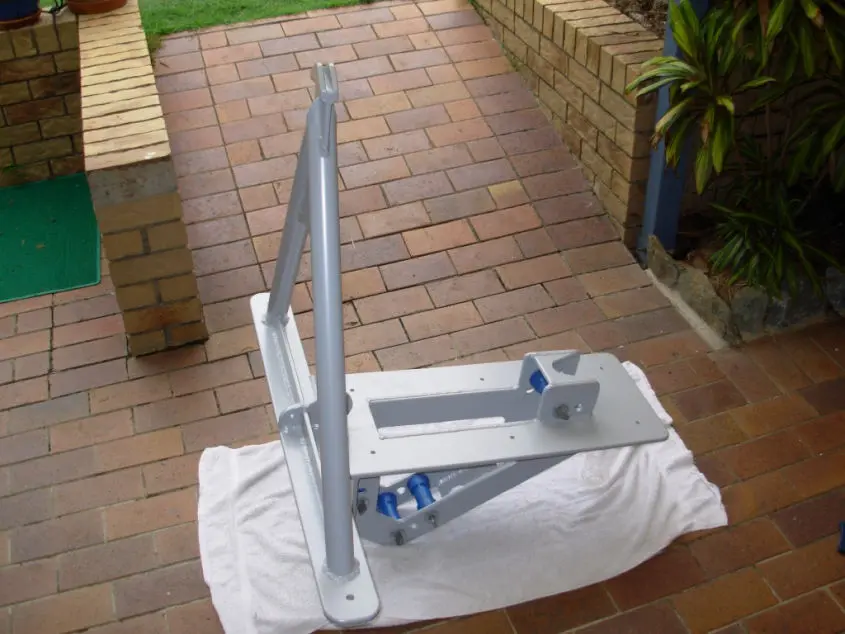
Using Stainless Steel would have proved too heavy, so it was to be Aluminium 5083 plate. Even with this alloy, weight would still be an issue, but one we were very happy to live with.
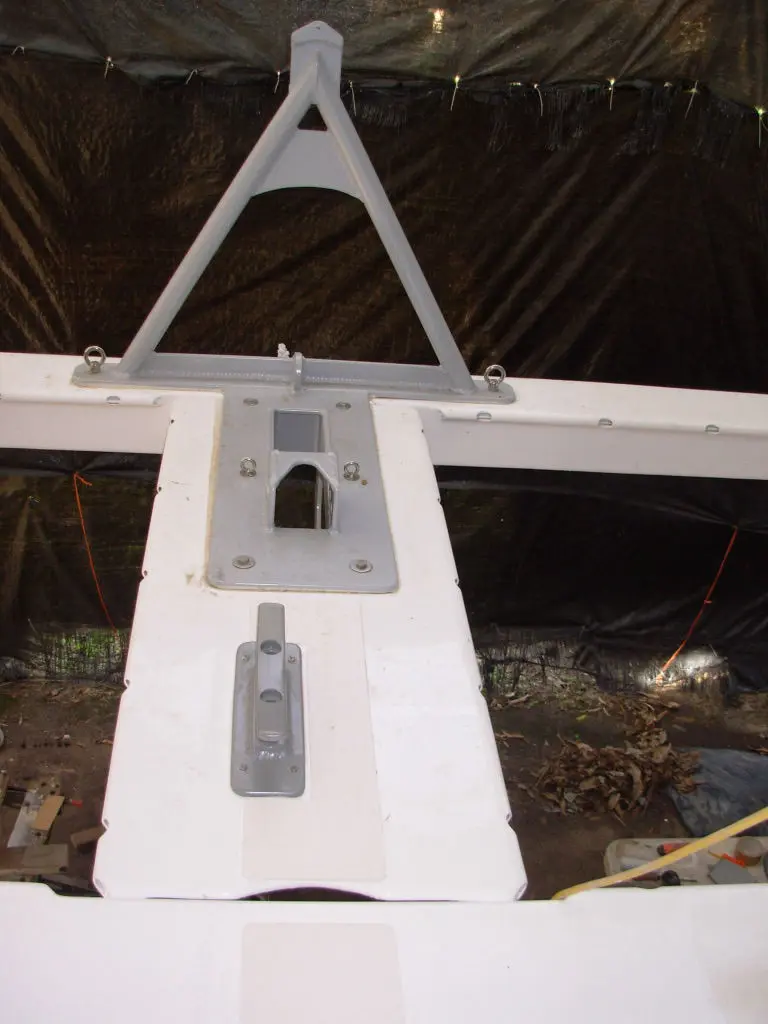
We have chosen to weld this to the ‘A-frame’ and make a single unit, reducing the number of screws required through the main forward beam and in turn reducing weight again.
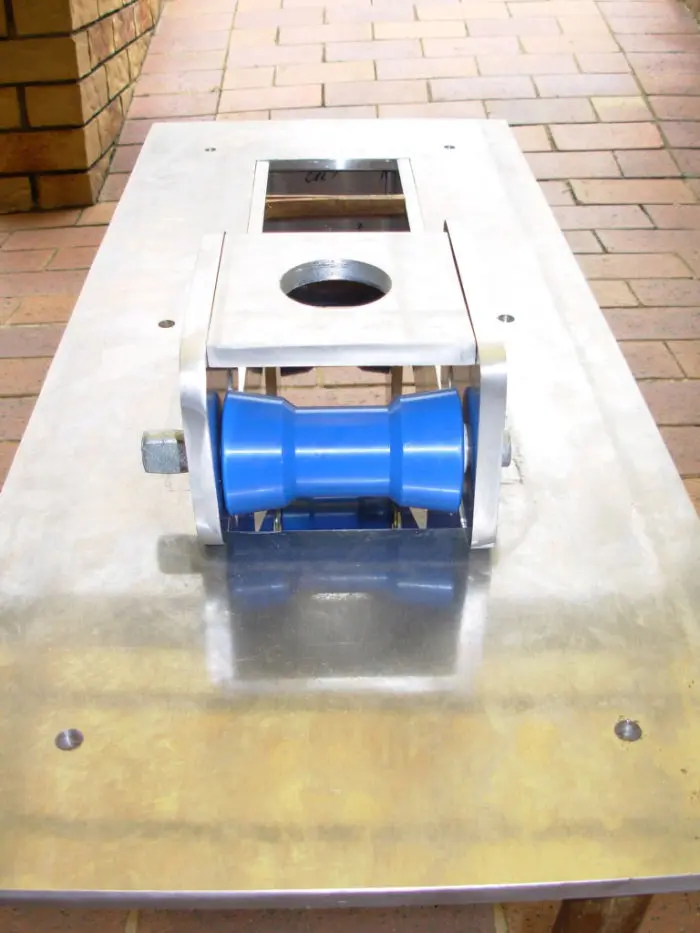
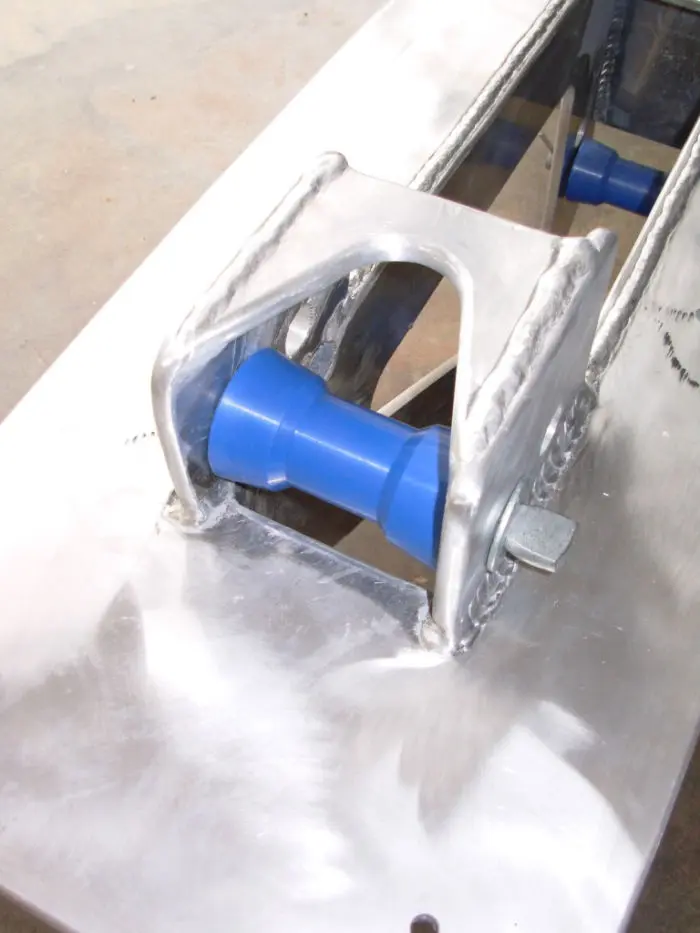
Others had told of wearing bushes on the winch rollers and even rollers coming away during retrieval process - this was challenge number two.
The roller system also needed to pull the anchor into the full-up position and not damage the timber fore beam in any way.
The latter forced us to make a decision on the primary anchor type that we needed and this ended up being a Sarca. We say primary as two other anchors will also be carried.
This type of anchor, while very expensive, is designed to withstand a variety of bottom types including mud, sand, gravel and rock, offering superb holding power in all conditions - so they say.
It also happens to have a self-righting arc over the top of the anchor making initial anchoring easier.
Anchor & its Roller Bracket
We have chosen to deviate from the plan in this area given our inexperience in the anchoring of such large vessels. We needed everything to be on our side when 'Murphy" comes knocking.
Unless one is aware of their boundaries during the retrieval process of the anchor, a no nonsense approach here is almost mandatory.
This meant that this particular item had to be beefed-up to take the stresses and moments we would be placing on the beam. We had been told that one should always winch from straight ahead at all times as the sideways stress moments would eventually cause unnecessary wear on the beam/winch area.
While this may appear a little eccentric, for those who are not in a real hurry, these can prove very useful and remove possible repairs at a later stage. Additional insurance as we saw it.